K9s is a terminal-based Kubernetes UI management tool. It’s just a single binary — you can manage your K8s cluster from any terminal. The controls are based on Vim, so if you’re comfortable with Vim, you’ll be up and running in minutes.
Installation
K9s supports Linux, macOS, and Windows. The recommended approach is to download the binary directly from the official releases page.
Like kubectl, K9s uses the kubeconfig specified by the KUBECONFIG environment variable by default. You can also specify a config file directly:
k9s --kubeconfig=xx
Walkthrough
Let’s use the official sample deployment to demonstrate K9s’ common operations.
kubectl create -f https://k8s.io/examples/application/deployment.yamlOnce created, we want to check the deployment status.
Type k9s in your terminal to enter the Context screen.
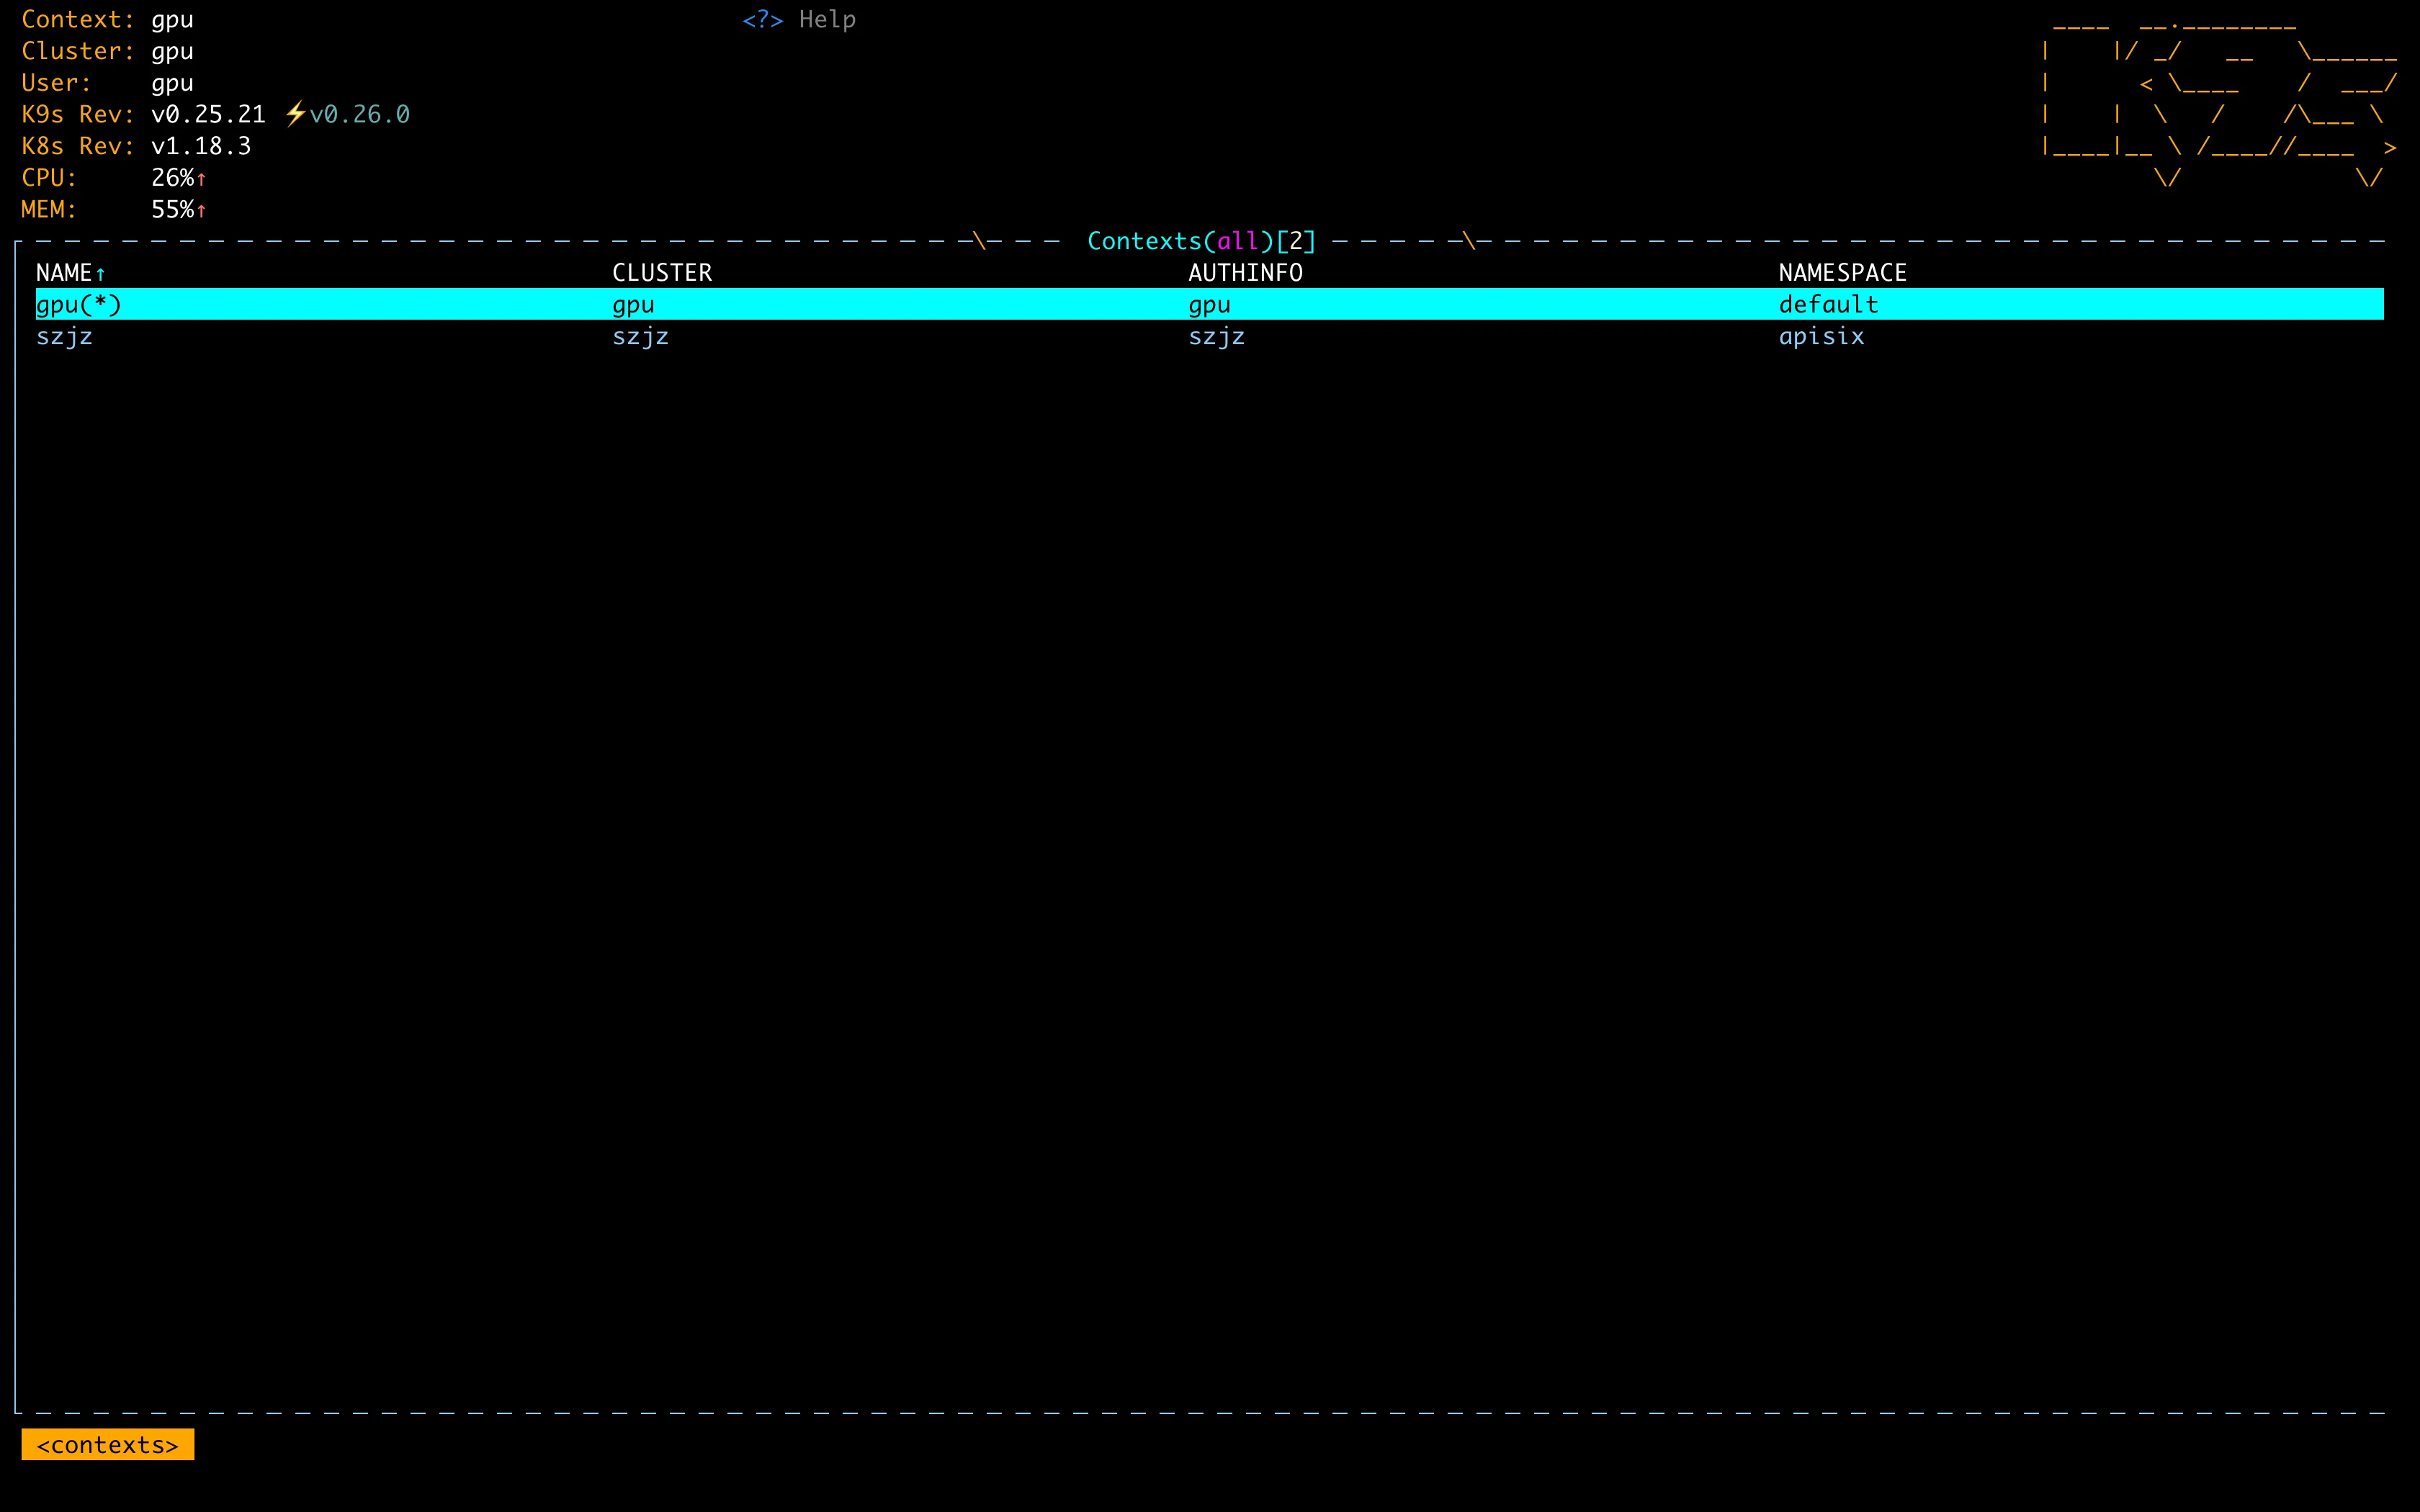
Use the arrow keys ↑↓ or Vim’s jk to select the cluster you want to manage, then press ENTER to enter it.
If you don’t see this screen, you can type :ctx and press ENTER to get there.
K9s’ basic commands are similar to Vim — use a colon followed by a resource type :resource to navigate to different resource views.
One level below the Context screen is Pods. If your namespace has too many Pods, you can filter with /filter — for example, type /nginx.
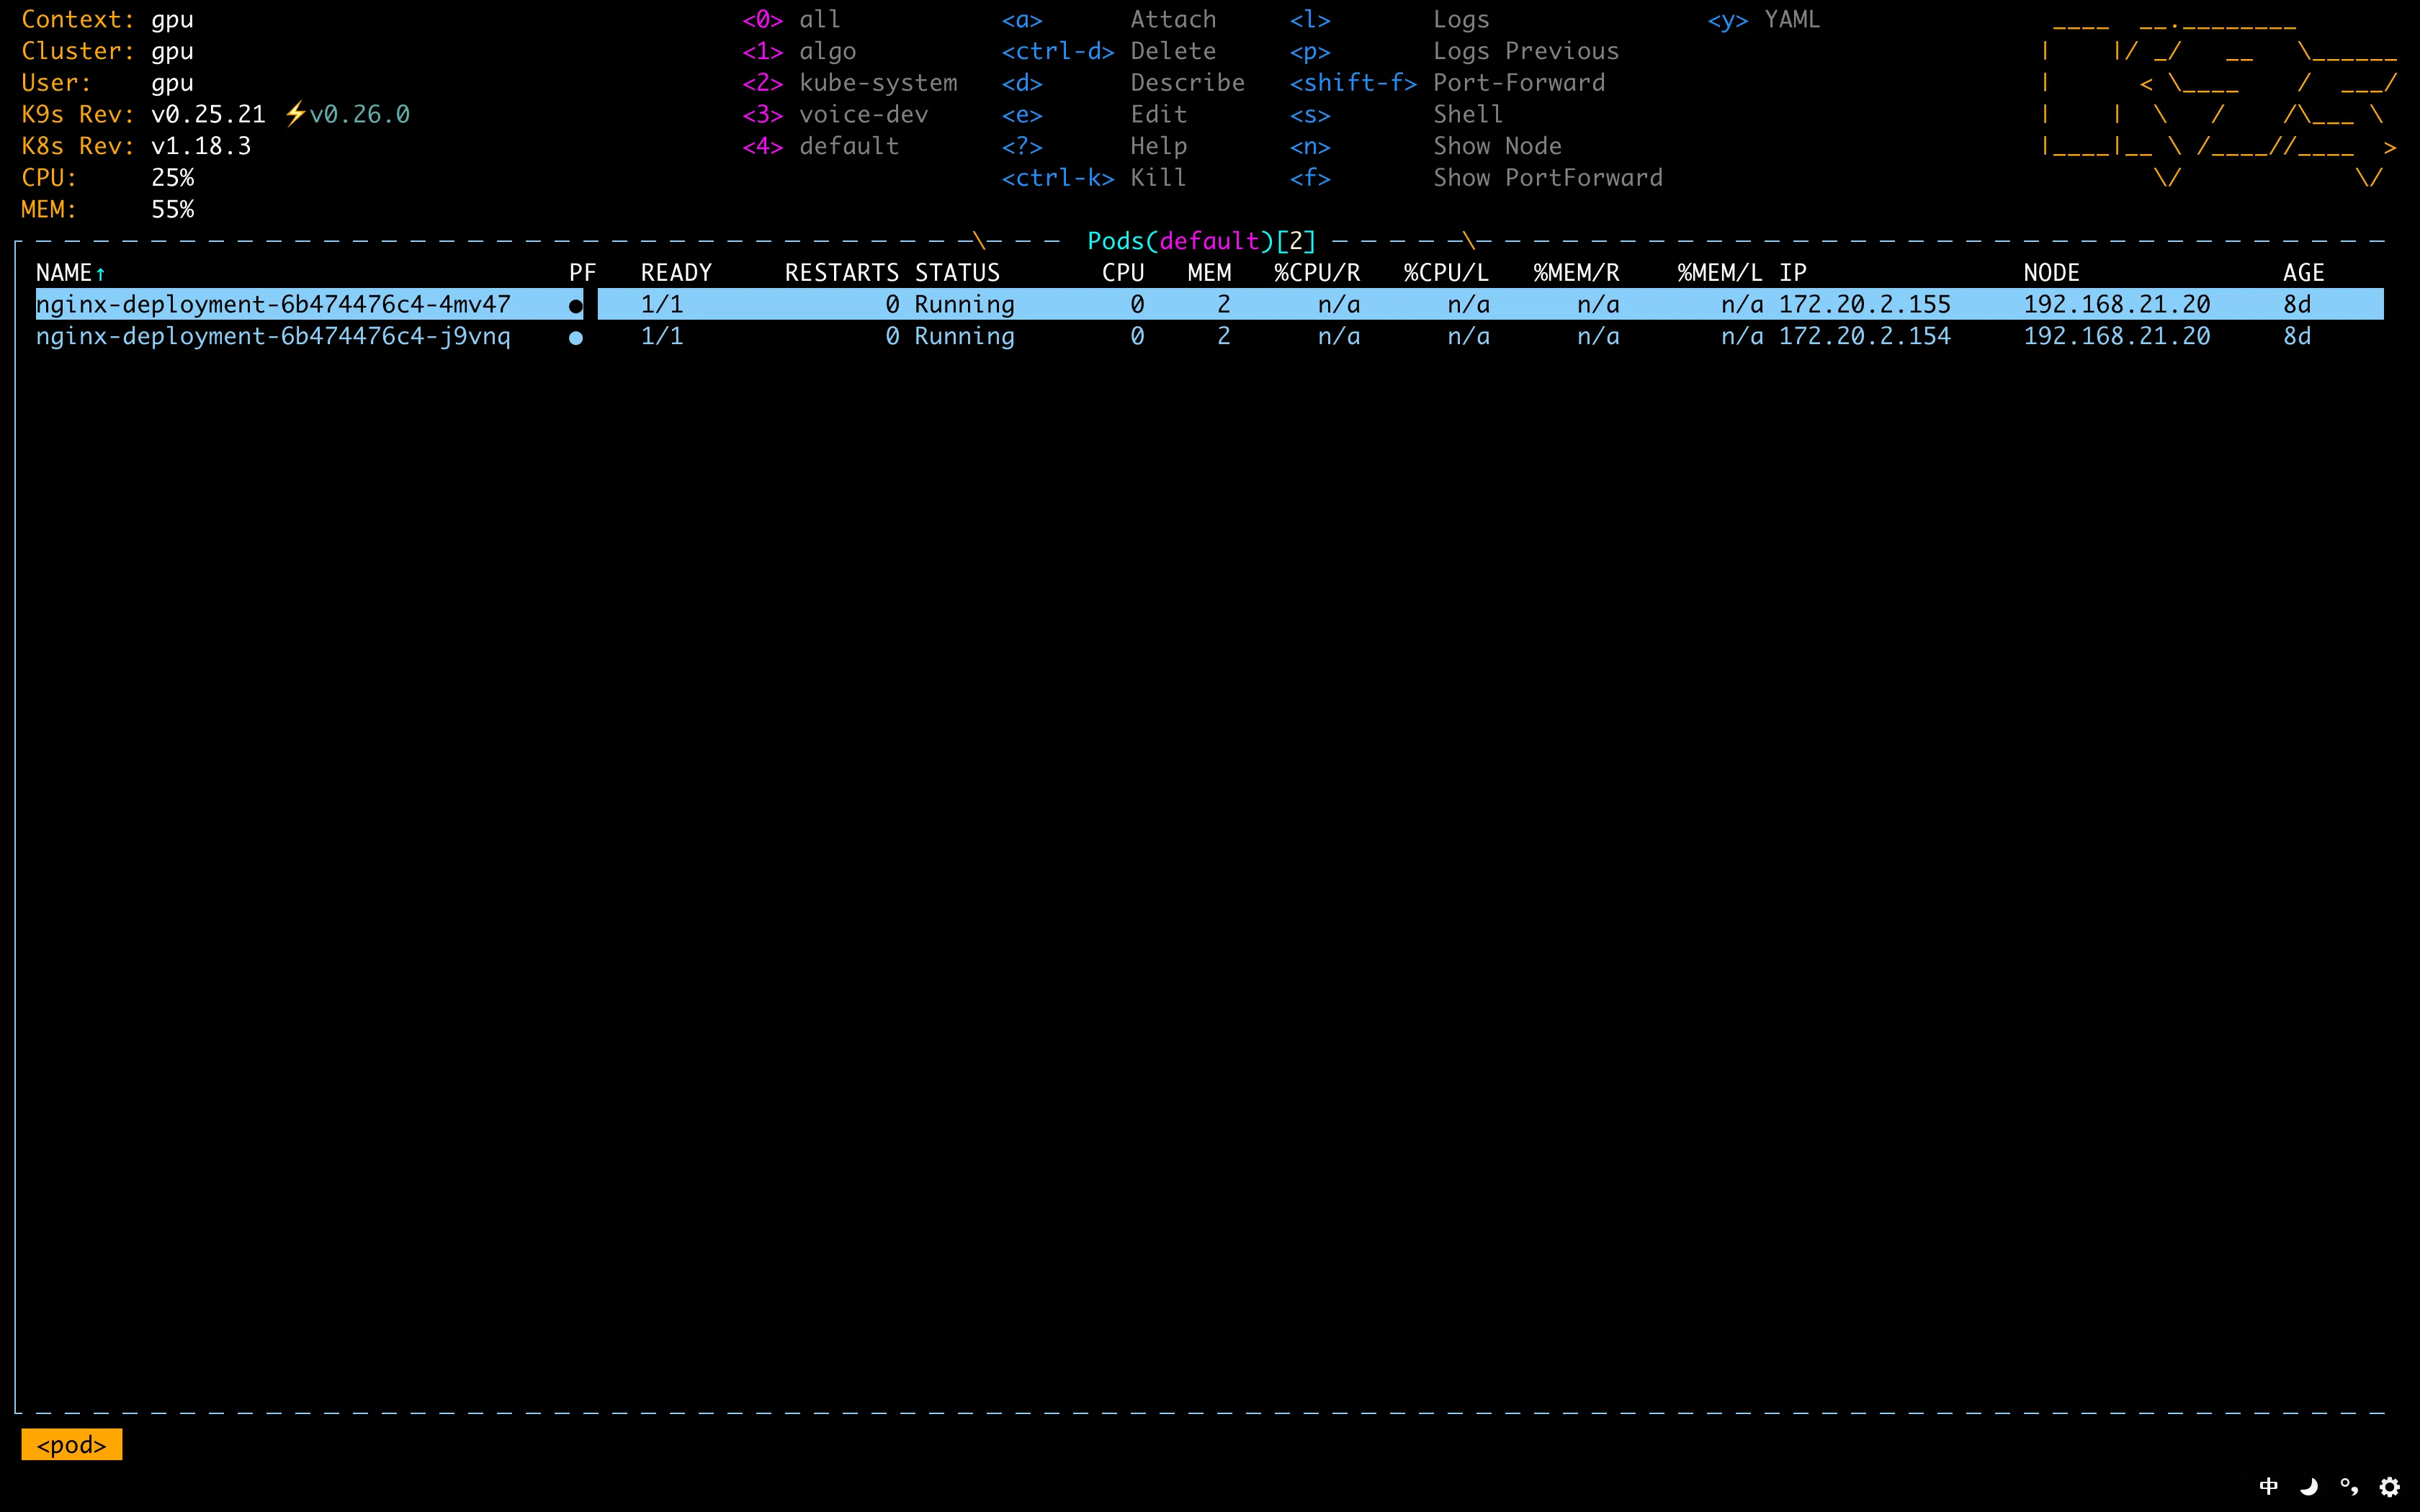
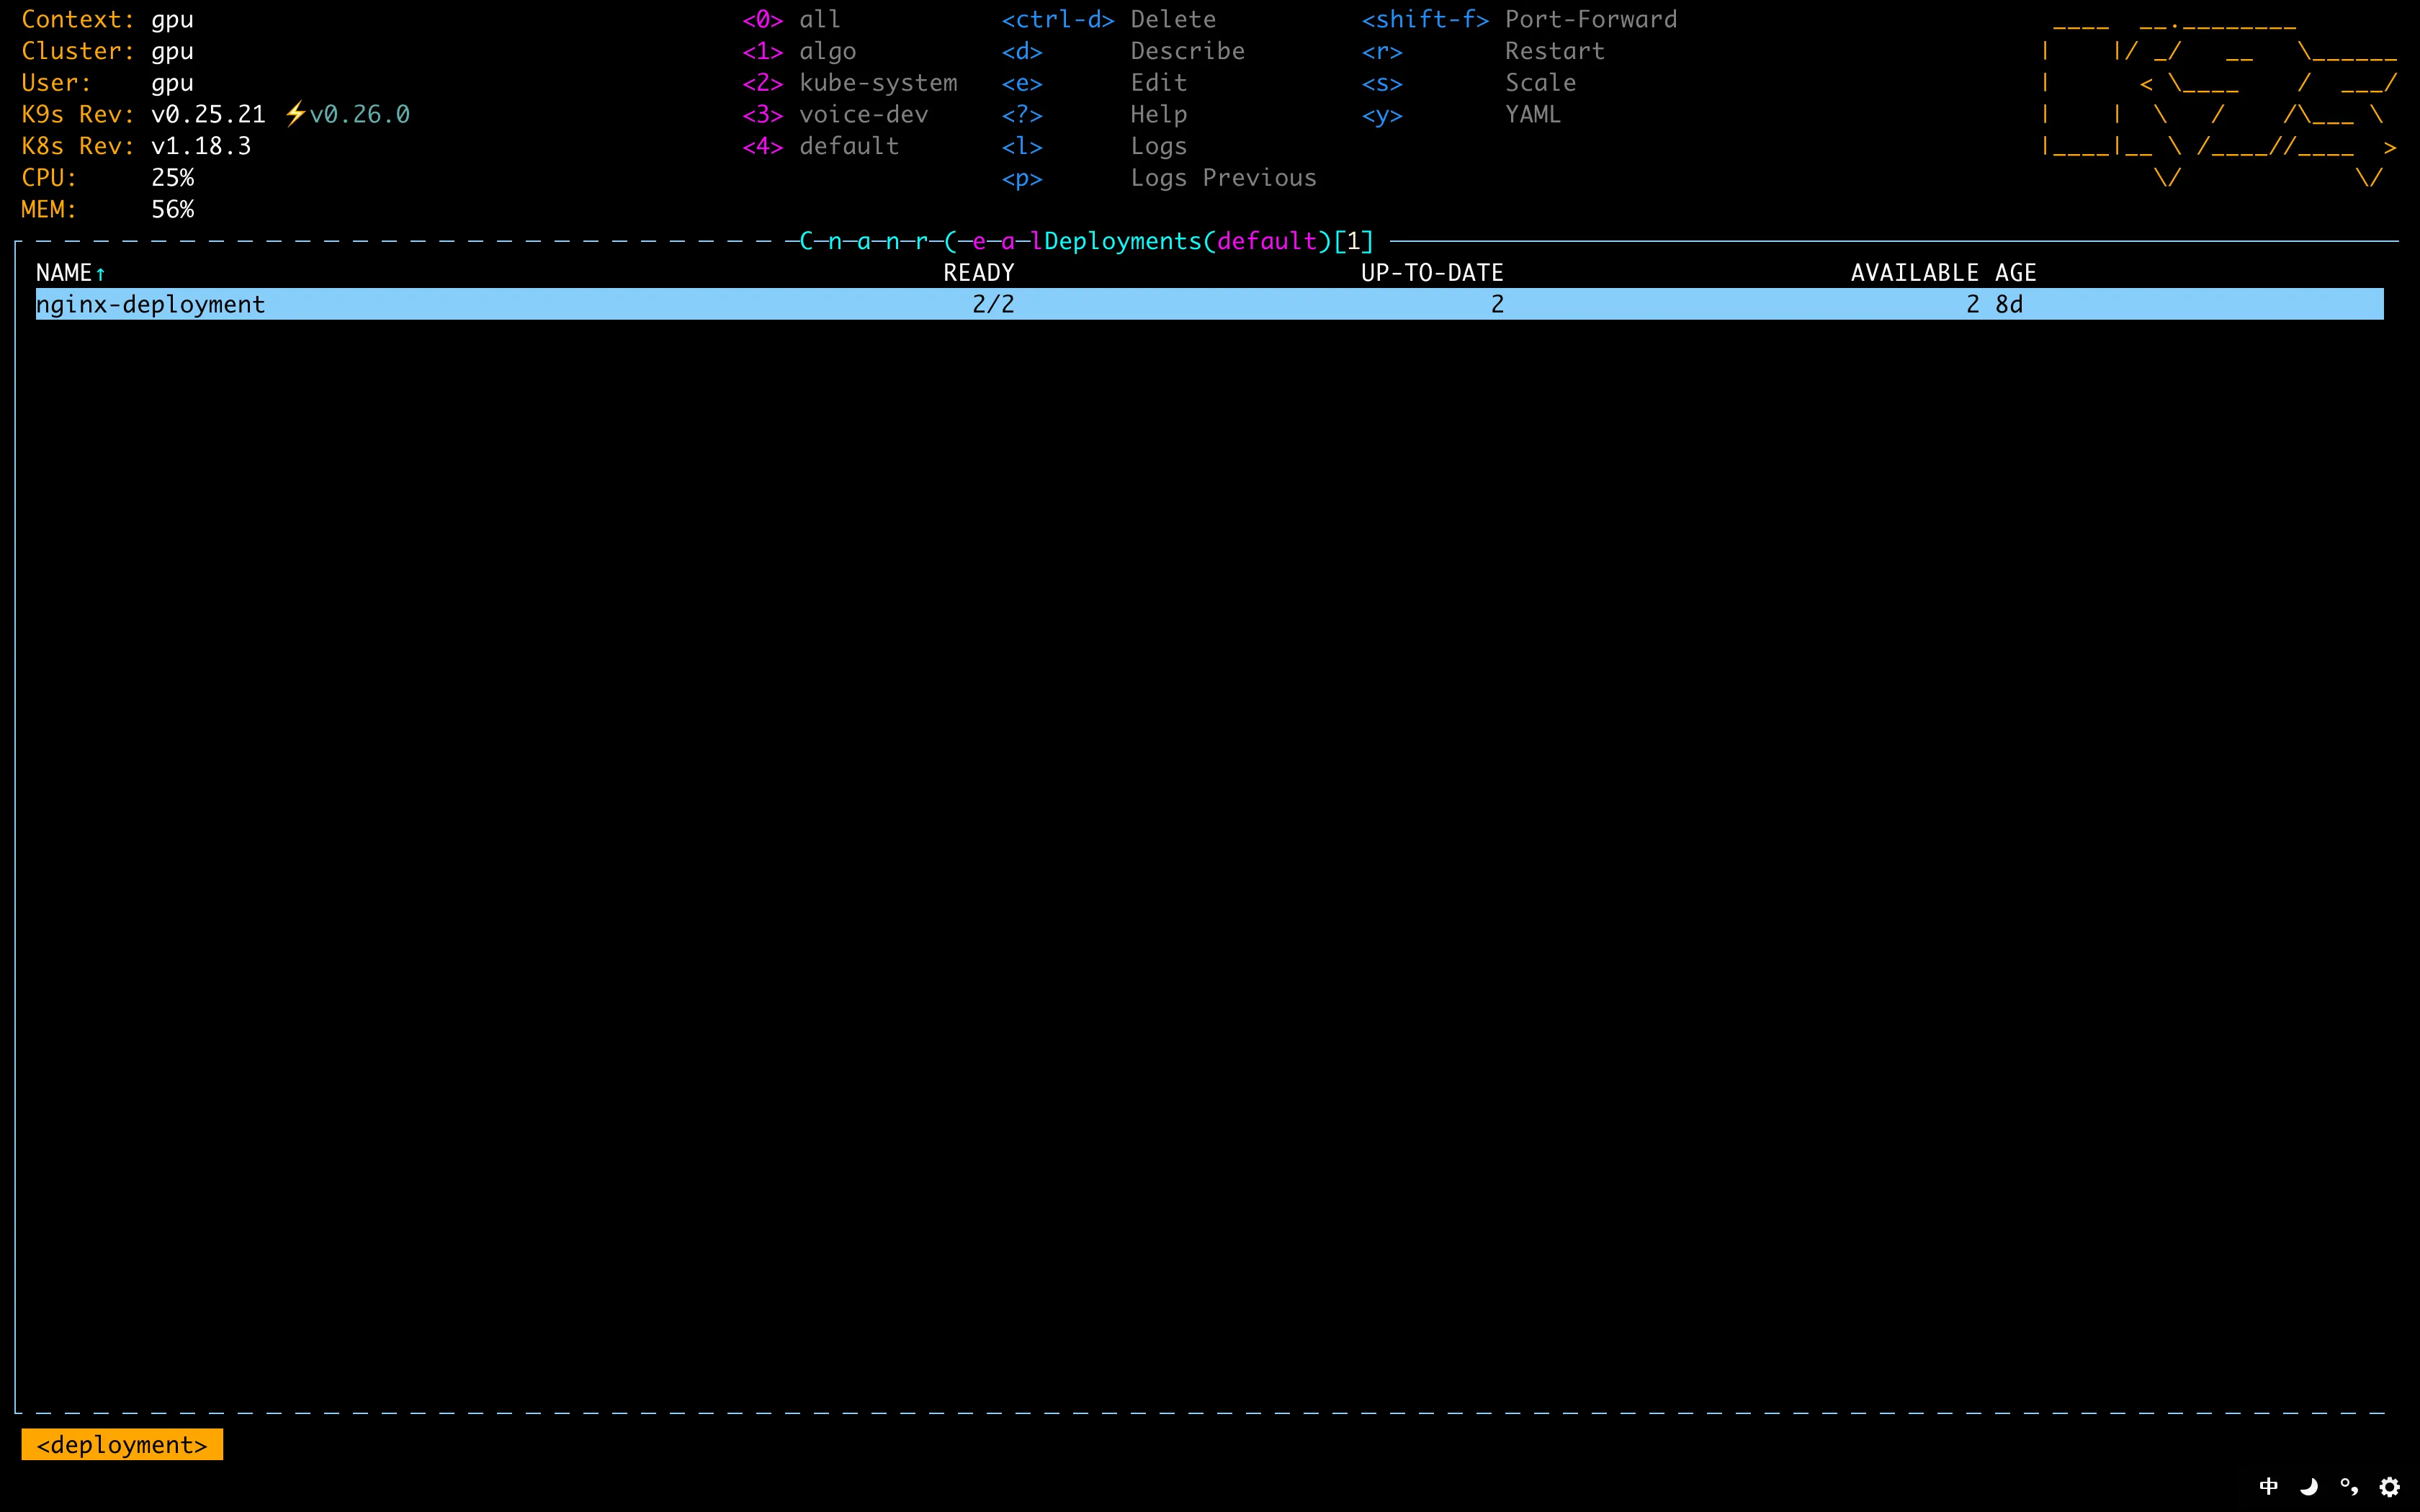
You can also type :deploy to jump to the Deployments screen, select the Nginx Deployment, and press ENTER to see all its Pods.
K9s has built-in command autocompletion — type de and press Tab to auto-complete to deploy.
At this point you can see the status of Pods or Deployments. For more detailed information, use the d or y shortcuts to view resource details or the YAML manifest.
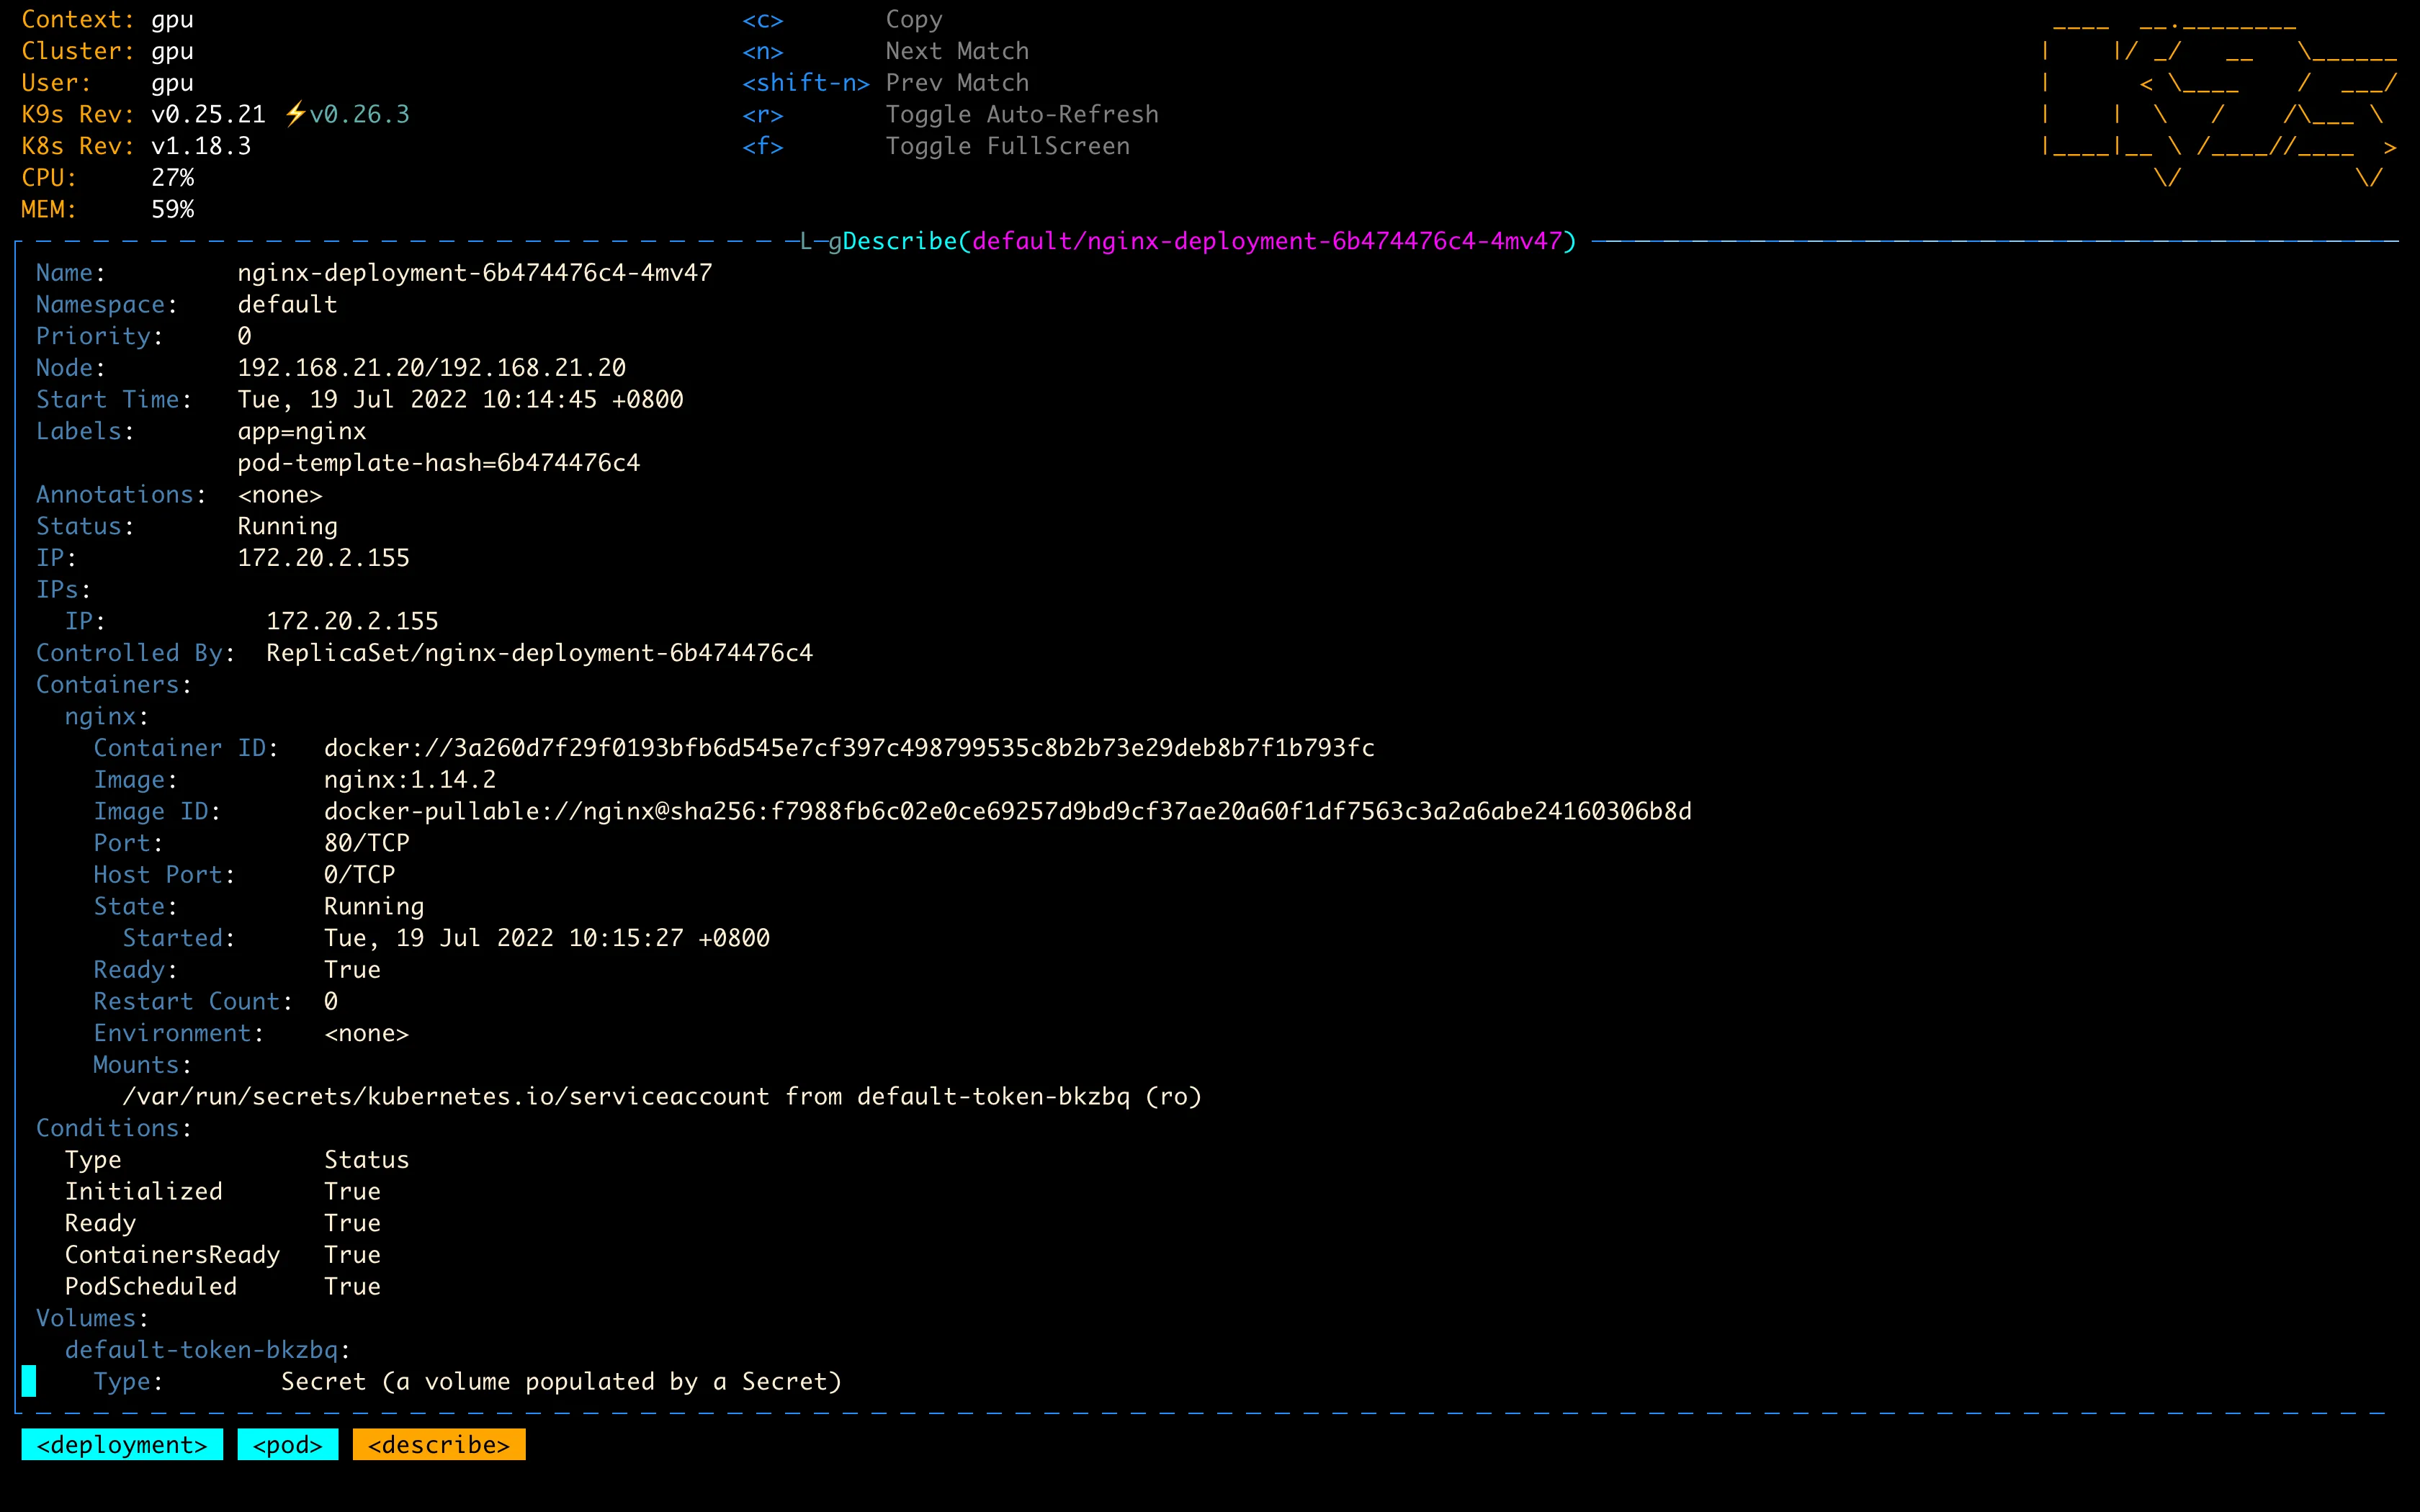
While browsing, you can also use common Vim navigation: Page Down, Page Up, g/G to jump to the top/bottom, and the filter still works.
Press ESC to go back up a level when done.
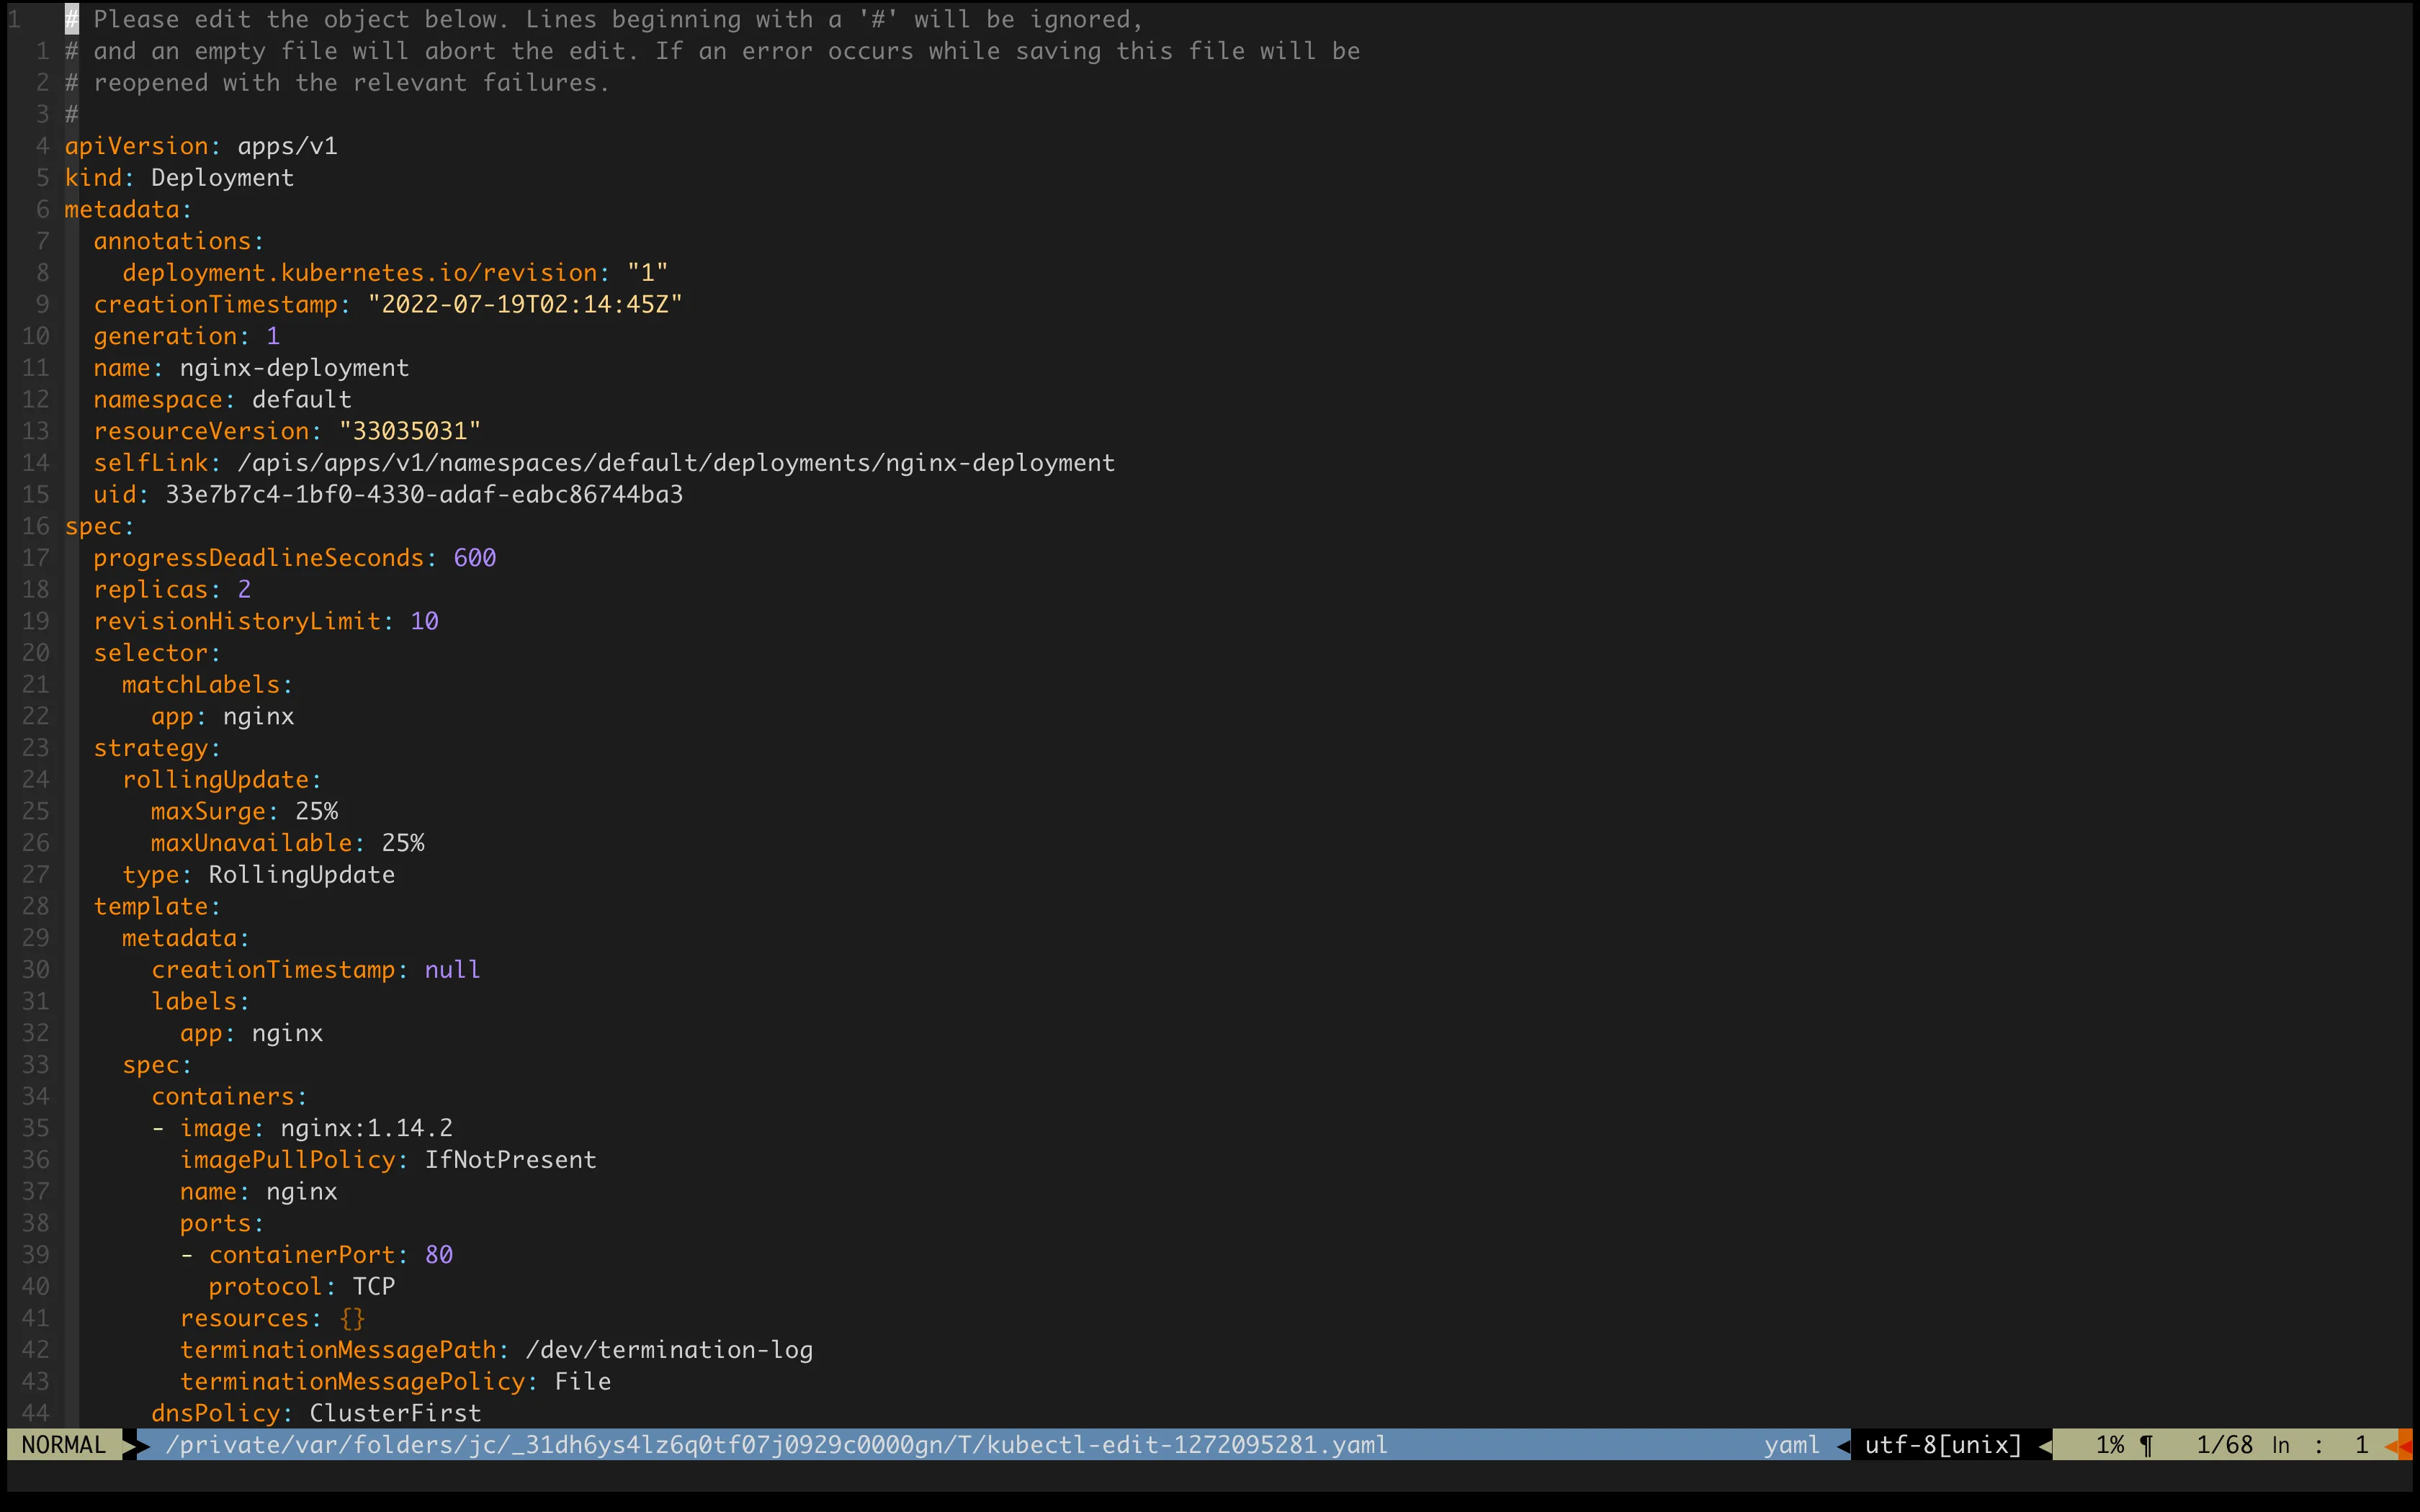
If you find a deployment misconfiguration, use the e shortcut to open Vim and edit the resource’s YAML definition.
Almost all resource types can be edited. If the modified syntax is incorrect, K9s will alert you that the change failed and it won’t be applied.
Once the deployment is confirmed successful, I want to see Nginx logs. From the Pods screen, press ENTER to go into the logs view, or from the Deployment or Pod screen, use the l shortcut to jump directly to logs.
Since the sample Nginx only shows access logs, the screen will display Waiting for logs....
What if we want to quickly access Nginx? K9s gives you two options.
The first is Shell — equivalent to kubectl exec pod /bin/sh. Press ESC to go back to the Pod screen, then press s to enter the container’s shell. If the Pod has multiple containers, you’ll be taken to a container selection screen first.
This was the feature that initially drew me to K9s — compared to manually composing commands, it’s much faster and more convenient.
Now type curl localhost:80 — but unfortunately, the image doesn’t include curl.
So we’ll go with the second option: port-forward. Type exit to leave the shell, then press Shift+f to enter the Port Forward screen.
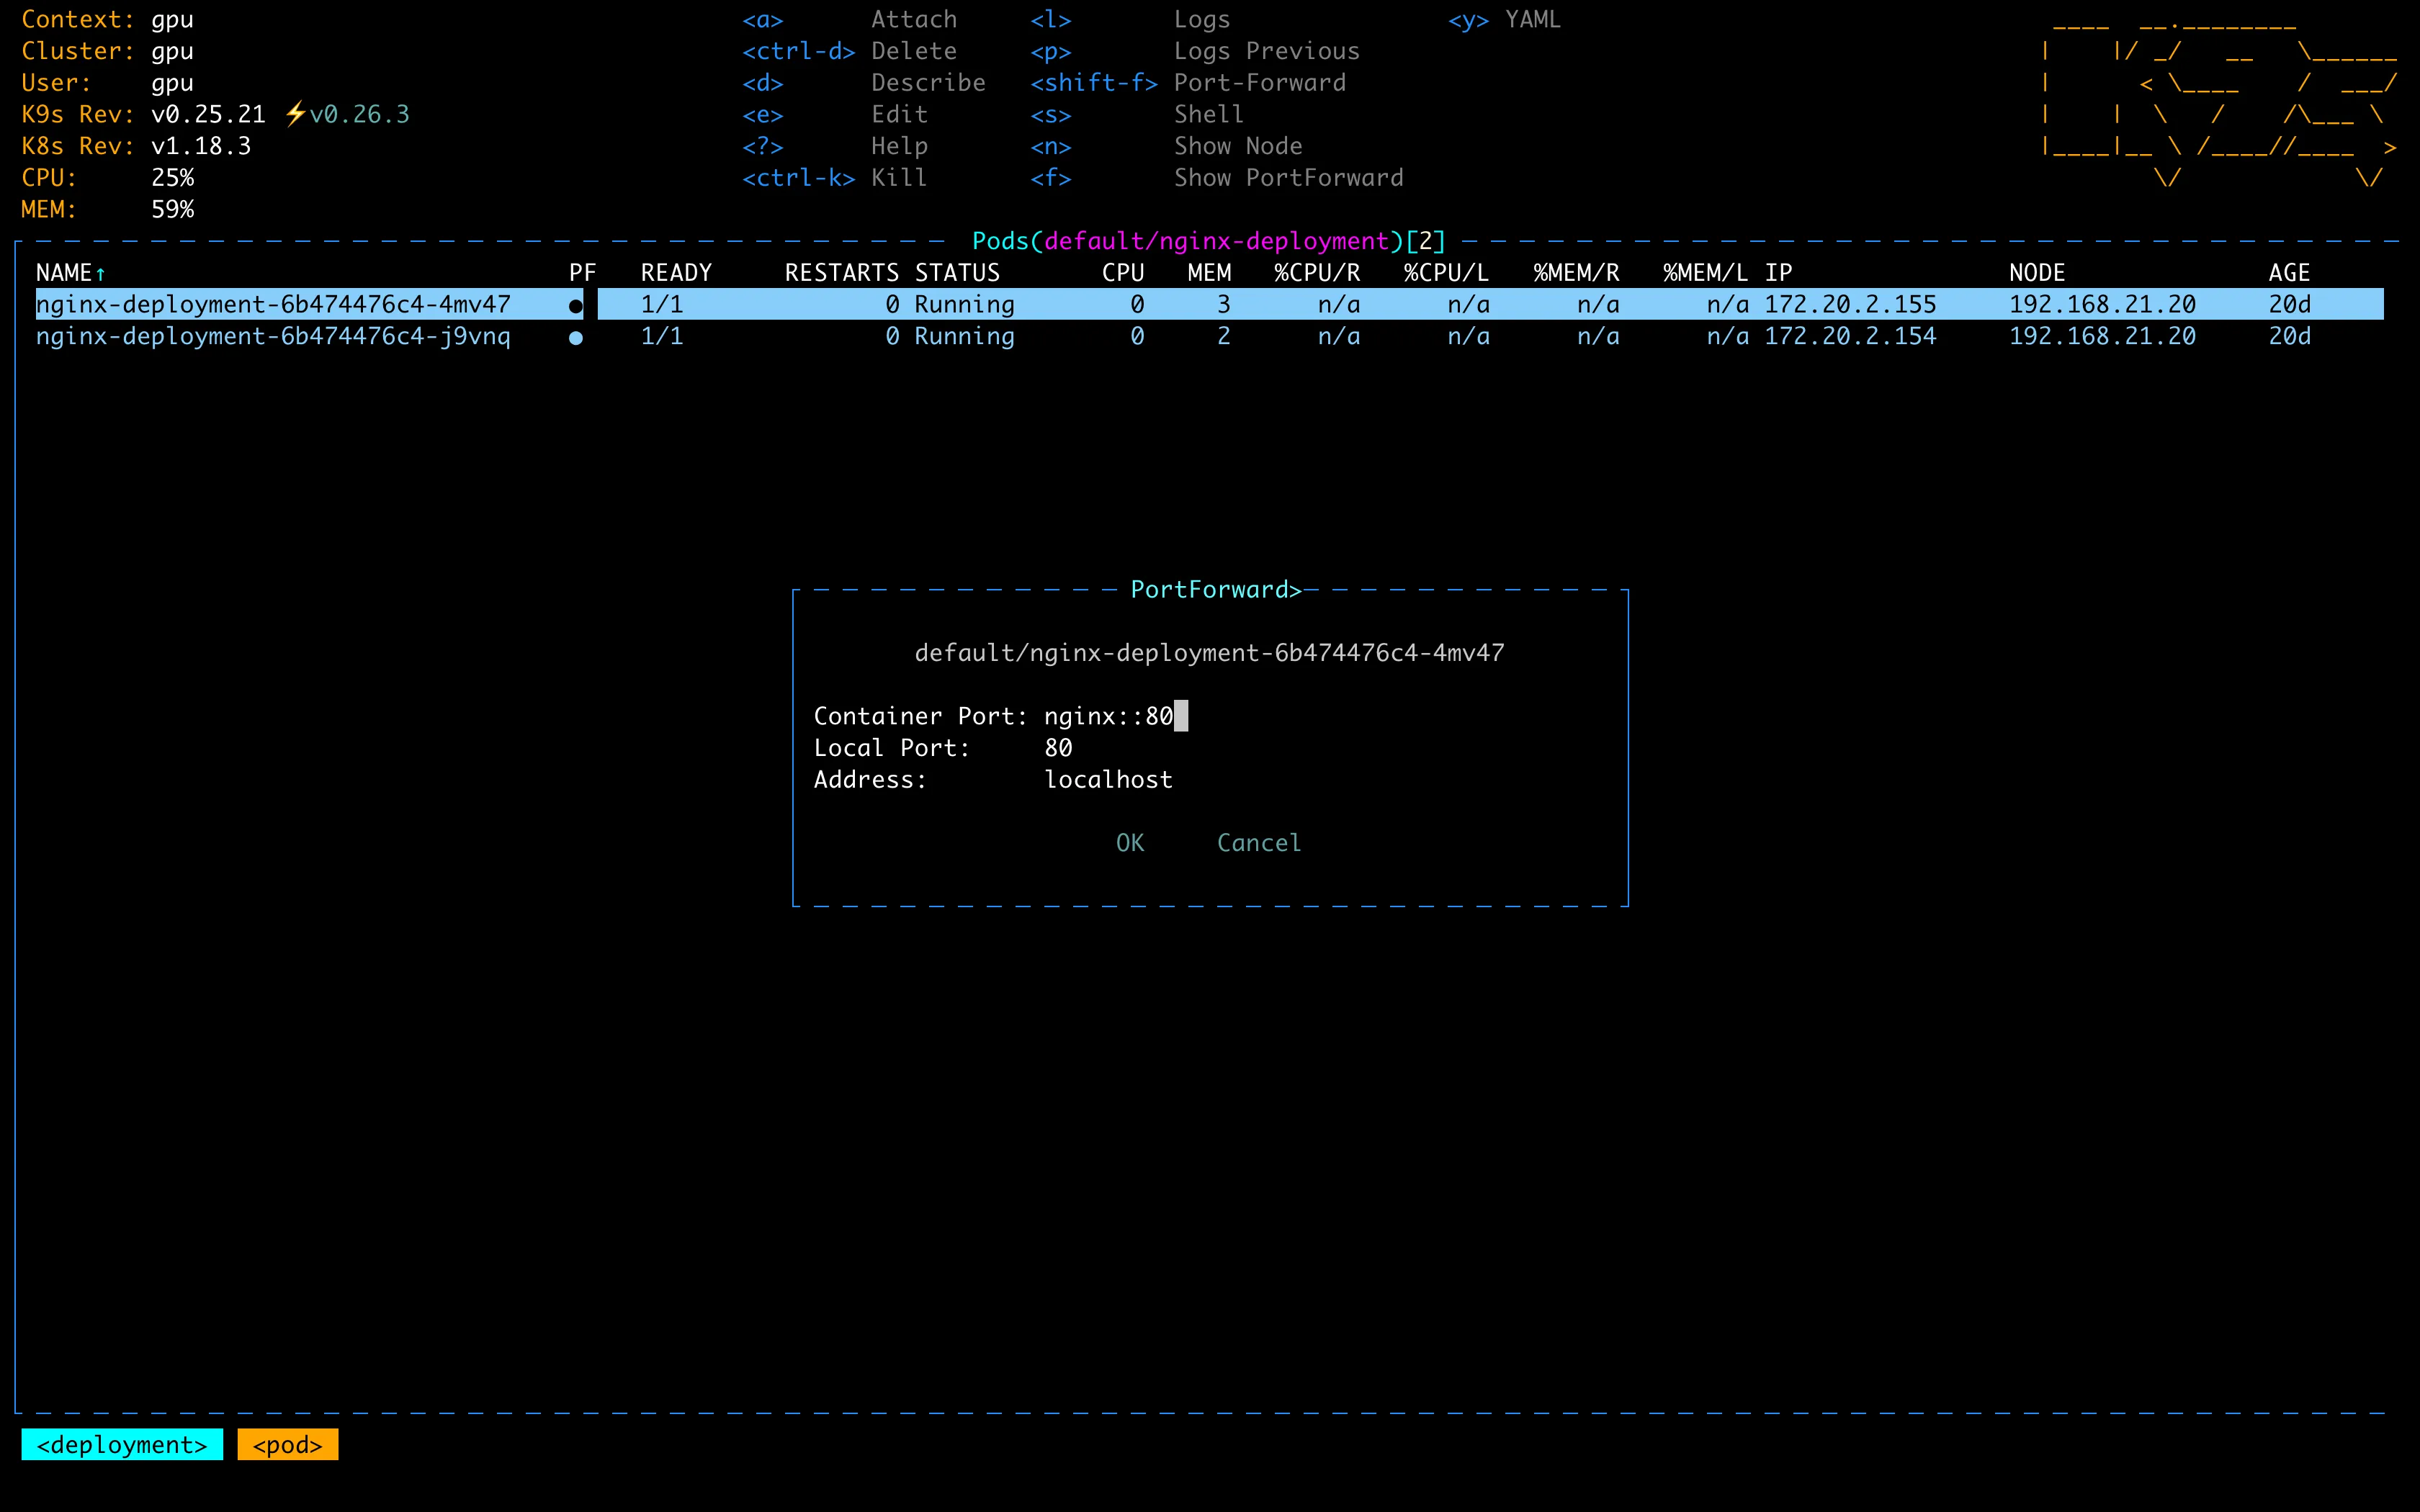
This corresponds to the kubectl port-forward command. Use Tab to switch between fields. Once confirmed, open a new terminal locally and run curl localhost:80.
Port forwards are terminated when you close K9s.
Now go back to the log screen and you’ll see the new log entries.
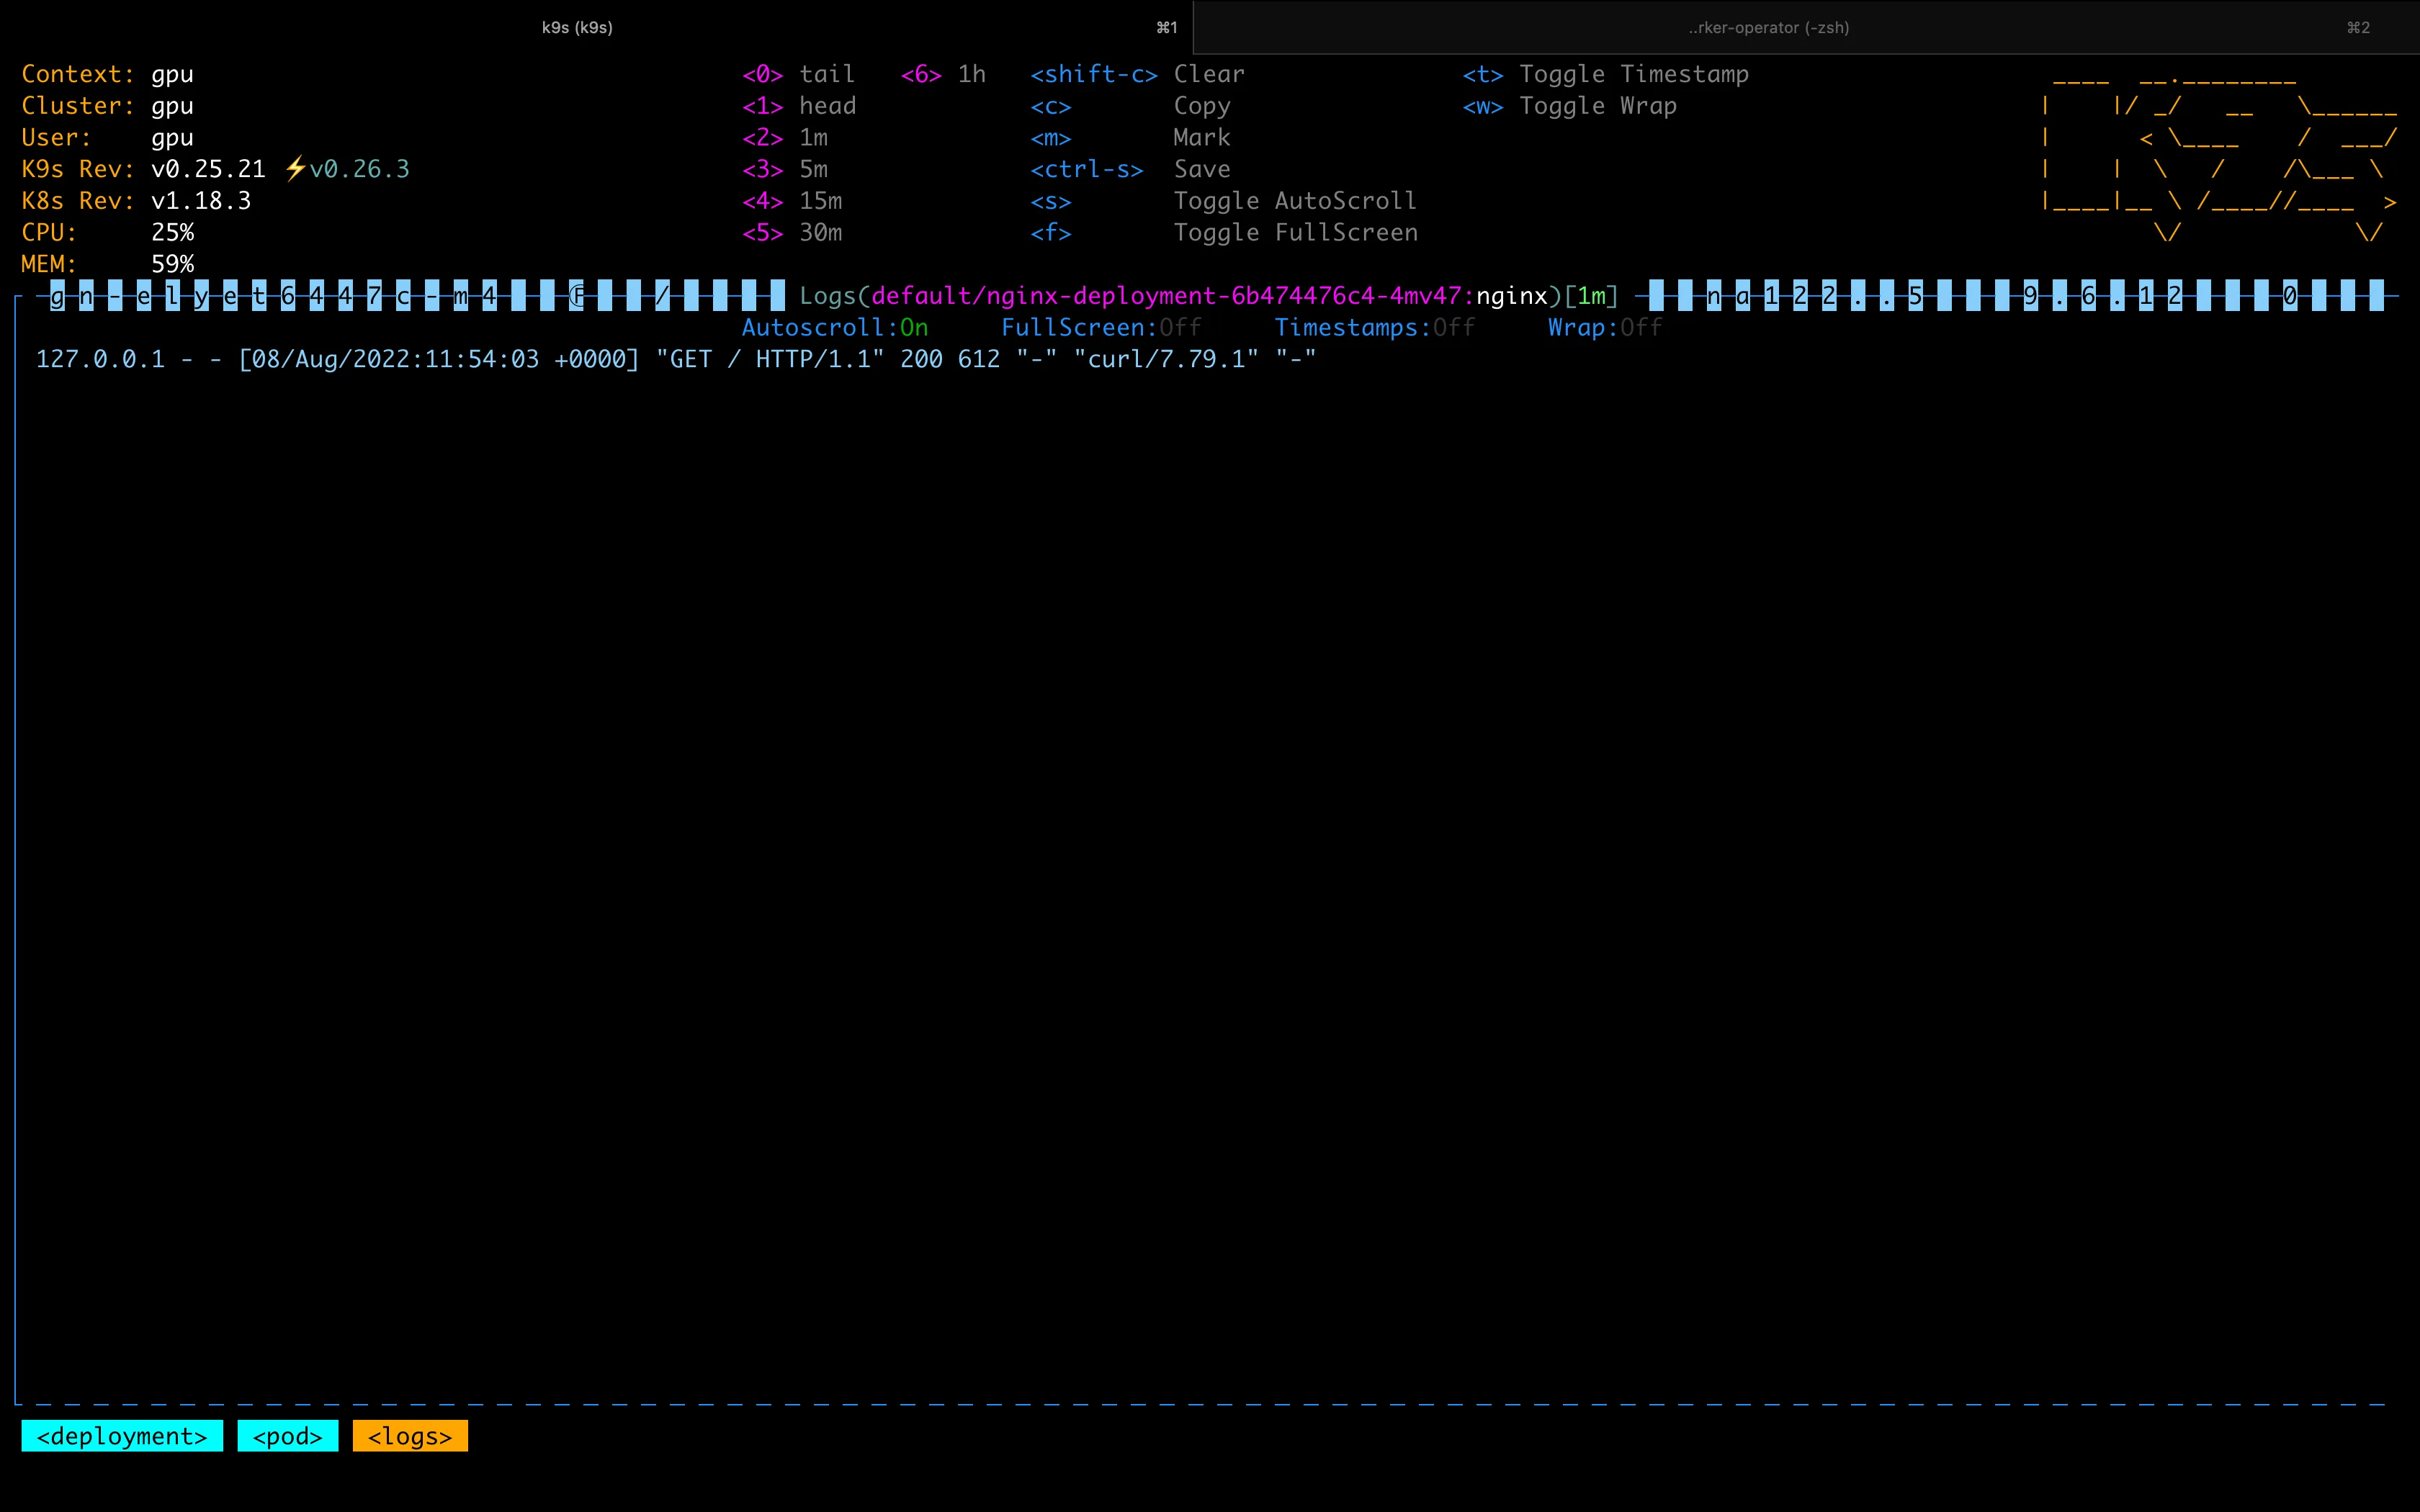
Navigating logs works just like Vim — movement, filtering, and jumping all apply.
When viewing container logs, I usually press 0 and w: 0 shows the tail (latest logs), and w enables line wrapping.
Beyond these basics, K9s also supports Node Shell (press s on the Node screen to enter the host container), Xray (a tree view of K8s resources), stress testing, and more. Check the official site if you’re interested.
That covers the operations I use most often with K9s. Below is a translated command reference.
Commands
| Action | Command | Notes |
|---|---|---|
| Show keyboard shortcuts | ? | |
| Show all cluster resources and their abbreviations | ctrl-a or :alias | e.g., service → svc |
| Quit | :q or ctrl-c | |
| Browse a resource type by name or abbreviation | :po⏎ | Accepts singular, plural, abbreviation, or alias. e.g., po, pod, pods, v1/pods |
| Browse resources in a specific namespace | :po namespace⏎ | |
| Filter resources | /filter⏎ | Supports Regex2, e.g., fred|blee to filter names matching fred or blee |
| Inverse filter | /!filter | Excludes matching resources. Not supported for log filtering |
| Filter by labels | /-l label-selector⏎ | |
| Fuzzy match filter | /-f filter | |
| Exit browse/command/filter mode | <esc> | |
| Common shortcuts: describe, view, edit, view logs, … | d, v, e, l, … | |
| Switch cluster context | :ctx⏎ | |
| Switch cluster context | :ctx context-name⏎ | |
| Switch namespace | :ns⏎ | |
| Browse all saved resources | :screendump or sd⏎ | |
| Delete resource (TAB and ENTER to confirm) | ctrl-d | |
| Kill a resource (no confirmation dialog) | ctrl-k | |
| Toggle wide columns | ctrl-w | Equivalent to kubectl ... -o wide |
| Browse resources in error state | ctrl-z | |
| Pulses view | :pulses or pu⏎ | GUI-like monitoring dashboard in the terminal |
| XRay view | :xray RESOURCE [NAMESPACE]⏎ | Tree structure showing related resources |
| Popeye view | :popeye or pop⏎ | Popeye is a K8s sanitizer that identifies potentially problematic resources and configs. See https://popeyecli.io/ |